Showing posts with label Galaxy. Show all posts

Saturday, September 7, 2013

How to install a new ROM (for all except S-ON HTC devices)

People always ask me how to install a new Android ROM onto their devices. This is very simple and I'll try my best to make it simpler. This tutorial assumes that your devices is rooted and you have a custom recovery (like Clockworkmod, TWRP or 4ext recovery) installed.

Before we get started, here are a few things you need to know.

1. Installing a new ROM requires a factory reset of your device. This deletes everything except user data files. Things you lose include user apps, contacts, messages, call log and saved WiFi passwords. On the other hand Gallery, Music, Downloaded items and files you can see in your file manager are not lost.
2. If you are installing an upgrade of your previously installed ROM, data wipe is not mandatory, unless the developer says so. Nevertheless, a data wipe is always recommended.
3. To backup data, you can use different apps. The simplest one you can use is Super Backup. For advanced users, I'd recommend Titanium Backup. This data can be restored after installing the app once the ROM has installed.
4. AOSP ROMs (Cyanogenmod, Android Open Kang Project and Paranoid Android) mostly do not have Google Apps included due to copyright issues. Google Apps or gapps are therefore separately downloaded and installed as a zip. You can downloaded the latest gapps for you ROM from here.

Here is what you need:

1. A custom ROM zip (and gapps, if required).
2. A rooted device with a custom recovery installed. This includes all devices except S-ON HTC devices. S-OFF HTC devices can use this method. For S-ON devices or to check which one are you, click here.

Here is how you install a new ROM:

1. Transfer the ROM to your internal memory. Internal memory is preferred because it is safer than an SD card because of a risk of corruption.
2. Boot your phone into recovery. Every device has its own way to boot into recovery which you can easily find out by googling it. If you can't find it, ask me.
3. Once in recovery, select factory reset and confirm. Then wipe cache. Then go to advanced and wipe dalvik cache. This completes the wiping process.
4. Go back and select install zip. Select and install the custom ROM zip.
4a. Install the gapps zip, if applicable.
5. Reboot your device.

Congratulations, your new ROM is ready to use!

Applicable to (but not limited to):
1. All Samsung Galaxy S devices.
2. All Samsung Galaxy Note devices.
3. Virtually all Samsung Galaxy devices.
4. HTC Sensation (if S-OFF).
5. All Nexus devices.

Friday, July 19, 2013

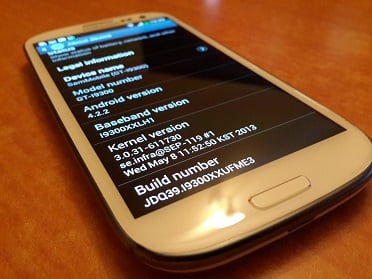
How to upgrade Samsung Galaxy S3 to Android 4.2.2

It's been a while since the official Jelly Bean 4.2.2 leaked for the Samsung Galaxy SIII and now I'd like to tell you how to upgrade your S3 to the latest official Android version.

What you need:
1. Odin (included in the download package below).
2. The official ROM.

How to upgrade:
1. Download both Odin and the ROM.
2. Boot your phone into download mode. (You can do this by holding Volume down, Home and Power keys till it takes you to download mode).
3. Select Continue.
4. Connect your phone to your PC.
5. Let all drivers install automatically. This will not work till all drivers are installed automatically.
6. Open Odin.
7. Add I9300XXUFME3_I9300OJKFME1_HOME.tar.md5 to PDA
8. Make sure re-partition is NOT ticked
9. Start flash, sit back and wait a few minutes.
10. It will boot automatically and you're good to go!

Saturday, March 9, 2013

How to root Samsung Galaxy S T959 (Vibrant)

Today I had the chance to root and upgrade a Samsung Vibrant, which is the T-Mobile version of the Samsung Galaxy S. It originally runs 2.1 Eclair but can be upgraded to 2.2 Froyo via Kies.

The trouble with Vibrant is that it cannot be rooted if it is running Froyo. First, it has to be downgraded to Eclair via Odin, and then can you apply the root update file. I wasn't even able to root it via the universal root tutorial.

For the sake of others, I will now list the steps of rooting the Samsung Vibrant in case it is running 2.2 Froyo.

1. Download Odin, this PIT file and this tar of the Stock 2.1 Eclair.
2. Put the phone into download mode. The best way to do that is to turn off the phone and reinsert the battery. Then press both volume up and down and connect the USB cable while holding them.
3. Let all the drivers install. This won't work till all the drivers are automatically installed.
4. Open Odin. You should see a COM port connected and colored yellow.
5. Select the PIT file, and put the tar file in PDA.
6. Re-partition will be checked and that's okay.
7. Click start.
8. Ideally, it should start and complete in about 5 minutes. (If it hangs or gets stuck at setting up connection, try again with different ports. For me, it didn't work for quite some time. Then I tried to restart the phone but it showed the triangle of death [a phone and a computer with a yellow triangle in between]. But when I tried it again with that screen, Odin worked the first time.)
9. When booted into Eclair, enable USB debugging from Applications> Development.
10. Copy this update.zip to the INTERNAL MEMORY. This file will root the phone and install Superuser and BusyBox.
11. Also copy this update.zip to the INTERNAL MEMORY. This file will install Clockworkmod Recovery. Obviously both files should be applied separately because at a time only one file named update.zip can be placed.
12. To install an update, boot into the recovery. To do that, turn off your phone and then turn it on by holding the volume down and power buttons. In the stock recovery, select "reinstall packages".
13. Repeat above step with Clockworkmod Recovery update.zip

Congratulations, you now have a rooted Samsung Galaxy S Vibrant T959! Feel free to flash new ROMs!

Source

Wednesday, February 6, 2013

Dual boot your Samsung Galaxy S3


If you own a Samsung Galaxy S3 and have also used AOSP ROMs, you'd know the awesomeness of both TouchWiz and AOSP ROMs (cyanogenmod, AOKP etc). The vanilla experience of AOSP and the goodies of Samsung's TouchWiz are both very tempting and it's very difficult to choose between the two. For this reason, XDA Elite Developer gokhanmoral has made a new kernel (SiyahKernel) with a custom recovery which enables you to dual boot your i9300 and enjoy both flavors.
Before we start, here are a few things to keep in mind:
  • Always make a nandroid backup in case anything goes wrong.
  • The kernel only supports TouchWiz and AOSP Jelly Bean ROMs (Any Ice Cream Sandwich or MIUI ROM is NOT supported) [Update: The latest build from MIUIAndroid is supported. Tested and working.]
  • Keep a backup kernel and recovery to flash, just in case you're not happy with Siyah.
Let's get started. Firstly, download the latest SiyahKernel from the developer's website. Transfer the ZIP to your phone and flash it through recovery. Reboot into your primary ROM and find the app STweaks. If it hasn't appeared, download it from Play Store for free. In STweaks, go to Dual Boot options and click "Hijack Recovery". Reboot into recovery.

In Siyah recovery, follow these steps:
Dual boot options.
  • Format 2nd ROM data, wipe cache, wipe dalvik cache.
  • Install 2nd ROM from (location)
  • Flash gapps
  • Flash SiyahKernel again to 2nd ROM
  • Reboot.

Once you've rebooted, you'll find that to reboot into the secondary ROM, you have to press the Home or Volume down key while it's booting. You can also boot into the 2nd ROM from STweaks. Another useful feature of STweaks is the slide2wake option, it is really awesome.
Enjoy!
Source

Wednesday, October 31, 2012

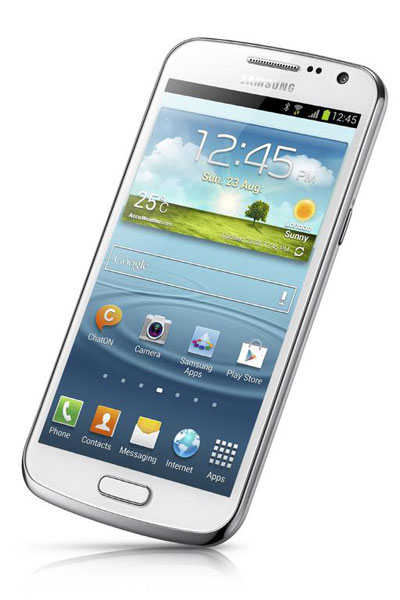
Samsung Galaxy Premier: Galaxy Nexus meets SIII


Galaxy Premier is one of Samsung’s ill-kept secret and the company has now officially announced the Galaxy Premier (I9260). The phone as expected, is an improved Galaxy Nexus with Galaxy S III-inspired design and features Samsung software improvements like TouchWiz UI, S Beam, Smart Stay, Direct Call, Pop-Up Play, S Voice, Best Photo and runs Android 4.1.

On the hardware front, it has a 4.65-inch HD Super AMOLED Display (1280×720), 8MP rear camera and 1.9MP front-facing camera, full HD video recording support, Wi-Fi, Bluetooth 4.0, GPS, NFC, 8GB or 16GB internal storage, microSD card slot up to 32GB and 2100mAh battery.