Tuesday, August 5, 2014

Samsun Galaxy Nexus broken Power button solution

If you have a Samsung Galaxy Nexus, you're bound to have problems with its power button. People who root their phones find a way around it but it can be a real problem if you're stuck on the black screen of death! The problem can be identified by a black screen with no response from the power button, not even while entering fastboot.
I encountered such a phone and found a solution for the problem. Here's what you do:

1. Take out the battery.
2. Connect the phone via USB to a computer.
3. When you hear the computer beeping, reinsert the battery.
4. When the charging sign appears, take out the battery again.
5. If the charging sign starts to flicker, reinsert the battery.
6. The phone will reboot.

If at first it doesn't boot, repeatedly take out and reinsert the battery while you see the charging sign, till the phone reboots.

Hope this helps, let me know of any queries!

Saturday, January 11, 2014

How to root, S-OFF and upgrade HTC Sensation XL

I just had my hands on an HTC Sensation XL and boy it is really hard to root. After a lot of hard work, I finally brought it down to a few simple steps. Here's a tutorial for those needing to root the device. Briefly, it consists of these steps:

1. Unlock bootloader from htcdev.com
2. Install recovery
3. Root
4. S-OFF

1. How to unlock HTC Sensation XL bootloader:
This is the simplest step. It is very easily guided by the HTC's official development website, htcdev.com. Simply go to the website and it will guide you through the entire process. If you have any trouble, ask me.

2. Install recovery:
Once you have unlocked the bootloader, it's time to install the recovery. Download the latest touch recovery from clockworkmod.com/rommanager for "Runnymede". Once downloaded, flash it using the fastboot tools. For example, if the recovery is named runnymede.img, the file has to be placed in the tools folder, the phone should be in fastboot mode and your command should be:
  • fastboot flash recovery runnymede.img
This will install the recovery

3. How to root HTC Sensation XL
To root the device, download this file, extract it and run runme.

4. How to S-OFF HTC Sensation XL
To enable S-OFF, you need to download this file and place the hboot file in the adb tools folder. Then, use the following commands to enable S-OFF:

  • adb push hboot_7230ddr2_Runnymede_6.28.6666.nb0 /data/local/tmp/hboot_7230ddr2_Runnymede_6.28.6666.nb0
  • adb shell
  • dd if=/data/local/tmp/hboot_7230ddr2_Runnymede_6.28.6666.nb0 of=/dev/block/mmcblk0p18
  • exit
  • adb reboot bootloader
Once this is done, install any compatible ICS RUU from androidruu.com to get hboot 1.28. This hboot is compatible for most custom ROMs.

Congratulations, you're all set to install any custom ROM on your HTC Sensation XL with S-OFF!

Sunday, November 17, 2013

How to install a ROM on S-ON HTC devices

Recently, I posted a post about installing a ROM on all android devices except HTC S-ON devices. Every HTC device is S-ON by default but there are some exploits for certain phones that enable you to make them S-OFF (Security-off). This security actually prevents a kernel from being flashed through the recovery. For this reason, there is one added step while installing a ROM on S-ON devices. This tutorial is mostly similar to the previous one.

Before we get started, here are a few things you need to know.

1. Installing a new ROM requires a factory reset of your device. This deletes everything except user data files. Things you lose include user apps, contacts, messages, call log and saved WiFi passwords. On the other hand Gallery, Music, Downloaded items and files you can see in your file manager are not lost.
2. If you are installing an upgrade of your previously installed ROM, data wipe is not mandatory, unless the developer says so. Nevertheless, a data wipe is always recommended.
3. To backup data, you can use different apps. The simplest one you can use is Super Backup. For advanced users, I'd recommend Titanium Backup. This data can be restored after installing the app once the ROM has installed.
4. AOSP ROMs (Cyanogenmod, Android Open Kang Project and Paranoid Android) mostly do not have Google Apps included due to copyright issues. Google Apps or gapps are therefore separately downloaded and installed as a zip. You can downloaded the latest gapps for you ROM from here.

Here is what you need:

1. A custom ROM zip (and gapps, if required).
2. A rooted device with a custom recovery installed.
3. Android SDK (just adb and fastboot tools needed)

Here is how you install a new ROM:

1. Extract the ROM to yield the boot.img file from the zip. Transfer the ROM zip to your internal memory.
2. Put the boot.img file in the sdk tools folder.
3. Open command prompt and navigate to the sdk tools folder.
4. Connect your device with USB debugging on in developer tools.
5. Reboot the device into fastboot from the sdk with the command "adb reboot fastboot"
6. Once the phone has rebooted into fastboot, showing fastboot menu, flash the kernel with command "fastboot flash boot boot.img"
7. Once it has been flashed, reboot into recovery.
8. Once in recovery, select factory reset and confirm. Then wipe cache. Then go to advanced and wipe dalvik cache. This completes the wiping process.
9. Go back and select install zip. Select and install the custom ROM zip.
9a. Install the gapps zip, if applicable.
10. Reboot your device.

Congratulations, your new ROM is ready to use!

Applicable to (but not limited to):
1. HTC One X
2. HTC One
3. HTC One S
4. HTC Sensation (if S-ON).

Saturday, September 7, 2013

How to install a new ROM (for all except S-ON HTC devices)

People always ask me how to install a new Android ROM onto their devices. This is very simple and I'll try my best to make it simpler. This tutorial assumes that your devices is rooted and you have a custom recovery (like Clockworkmod, TWRP or 4ext recovery) installed.

Before we get started, here are a few things you need to know.

1. Installing a new ROM requires a factory reset of your device. This deletes everything except user data files. Things you lose include user apps, contacts, messages, call log and saved WiFi passwords. On the other hand Gallery, Music, Downloaded items and files you can see in your file manager are not lost.
2. If you are installing an upgrade of your previously installed ROM, data wipe is not mandatory, unless the developer says so. Nevertheless, a data wipe is always recommended.
3. To backup data, you can use different apps. The simplest one you can use is Super Backup. For advanced users, I'd recommend Titanium Backup. This data can be restored after installing the app once the ROM has installed.
4. AOSP ROMs (Cyanogenmod, Android Open Kang Project and Paranoid Android) mostly do not have Google Apps included due to copyright issues. Google Apps or gapps are therefore separately downloaded and installed as a zip. You can downloaded the latest gapps for you ROM from here.

Here is what you need:

1. A custom ROM zip (and gapps, if required).
2. A rooted device with a custom recovery installed. This includes all devices except S-ON HTC devices. S-OFF HTC devices can use this method. For S-ON devices or to check which one are you, click here.

Here is how you install a new ROM:

1. Transfer the ROM to your internal memory. Internal memory is preferred because it is safer than an SD card because of a risk of corruption.
2. Boot your phone into recovery. Every device has its own way to boot into recovery which you can easily find out by googling it. If you can't find it, ask me.
3. Once in recovery, select factory reset and confirm. Then wipe cache. Then go to advanced and wipe dalvik cache. This completes the wiping process.
4. Go back and select install zip. Select and install the custom ROM zip.
4a. Install the gapps zip, if applicable.
5. Reboot your device.

Congratulations, your new ROM is ready to use!

Applicable to (but not limited to):
1. All Samsung Galaxy S devices.
2. All Samsung Galaxy Note devices.
3. Virtually all Samsung Galaxy devices.
4. HTC Sensation (if S-OFF).
5. All Nexus devices.

Thursday, July 25, 2013

[Off-Topic] Solution to "Please insert correct map disc" {edit: link is dead}

I own a Toyota Vitz 2009 model which comes with an NDDN-W58 audio system installed. It was a great hassle to get it's stereo working if you get the error "Please insert correct map disc". I finally got it working so I thought I'd share how to get rid of this issue.
Firstly you need to know that there is no known way of changing the language of the stereo system. Also there is no way to be able to run DVD's while the car is moving either. This tutorial is only to get rid of the aforementioned issue.
Here's what you need to do:

1. T download the map disc image, go to http://dh16.com/27454228 (Google Chrome is recommended because this page is in Russian) [link is dead now, will refresh when I get time.]
2. Click Download in the "Free" column in the lower part of the page.
3. A page full of advertisements will open up and you need to click on one to continue.
4. After clicking on an ad, a countdown of 30 seconds will begin at the top which will end with the download link. Click on it.
5. Enter the captcha code on the download page and proceed with the download.
6. Extract the rar to yield the ISO file.
7. Burn the ISO file onto a blank DVD with a burning software at 4x (ImgBurn is recommended).
8. Once done, this will be your map disc.
9. Insert it into the Map Disc slot into your stereo.
10. Voila! The stereo works like a charm!

Feel free to ask about any confusion.

Friday, July 19, 2013

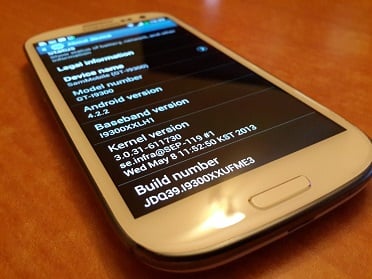
How to upgrade Samsung Galaxy S3 to Android 4.2.2

It's been a while since the official Jelly Bean 4.2.2 leaked for the Samsung Galaxy SIII and now I'd like to tell you how to upgrade your S3 to the latest official Android version.

What you need:
1. Odin (included in the download package below).
2. The official ROM.

How to upgrade:
1. Download both Odin and the ROM.
2. Boot your phone into download mode. (You can do this by holding Volume down, Home and Power keys till it takes you to download mode).
3. Select Continue.
4. Connect your phone to your PC.
5. Let all drivers install automatically. This will not work till all drivers are installed automatically.
6. Open Odin.
7. Add I9300XXUFME3_I9300OJKFME1_HOME.tar.md5 to PDA
8. Make sure re-partition is NOT ticked
9. Start flash, sit back and wait a few minutes.
10. It will boot automatically and you're good to go!

Monday, July 1, 2013

How to upgrade Samsung Wave GT-S8500

 
Today I have a Samsung Wave GT-S8500 on my hands. I am running Windows 8 and have the latest Samsung Kies installed. Still, I had a lot of trouble so I thought I'd share my experience. Here's what you need.

1. These drivers.
2. Multiloader v5.67
3. Bada update 1.2 for your country.
4. Bada update 2.0 for your country or the default one.

Note: You can donwload the updates from SamMobile.

After you have all the files and have installed the drivers, here is how to install an update:
0. Connect your phone in Download mode. To boot into download mode, turn it off, take out and reinsert the battery, keep pressing the volume down and camera button and turn it on with the power/ end call button (all three buttons should be pressed till you see the download mode).
1. Extract the relevant update.
2. Open Multiloader. It should show a COM port as ready. If it doesn't you are either not in download mode or you are missing drivers.
3. Select LSI.
4. Check Boot change and Full donwload.
5. Click Boot and select the BOOTFILES folder.
6. Click AMS and select amss.bin file that is located on your BOOTFILES folder and same goes to the following.
7. Click Apps and select apps_compressed.bin file.
8. Click Rsrc1 and select Rsrc_ Open_Europe_Common.rc1 file
9. Click Rsrc2 and select Rsrc2_ (Low/Mid).rc2 file
10. Click Factory FS and select FactoryFs_ Open_Europe_Slav.ffs file
11. Click CSC and select S8500XXXXX.csc file
12. Click SHP APP and select ShpApp.app file
13. Click FOTA and select .fota file
14. Click Download and wait for reboot.

You phone will reboot into the version of bada installed. Enjoy!

Note: If you use the Default Bada 2.0 given above, it boots into German language. To change the language, follow these steps-
Einstellungen> Allgemein> Sprache> Anzeige> English> Ja

Saturday, May 18, 2013

ADB and Fastboot drivers

One of the major problems in getting your Android development going is getting your drivers to work, especially on Windows 7 and Windows 8. Here is a set of drivers for this particular purpose. Go to device manager, right click on any of your devices that is not installed correctly and click update driver. Then manually direct the path to this folder, Windows will automatically detect the driver. If it warns you about the driver not being signed, install it anyway. This is particularly hard on Windows 8 in which installing unsigned drivers is a drag. You can google that if you're running Windows 8.

Download here.

Note that these drivers are actually for Nexus devices (LG Nexus 4, Samsung Galaxy Nexus and Samsung Nexus S) but they ought to work with virtually any Android device.

Comment below if you need any help.

Saturday, March 9, 2013

How to root Samsung Galaxy S T959 (Vibrant)

Today I had the chance to root and upgrade a Samsung Vibrant, which is the T-Mobile version of the Samsung Galaxy S. It originally runs 2.1 Eclair but can be upgraded to 2.2 Froyo via Kies.

The trouble with Vibrant is that it cannot be rooted if it is running Froyo. First, it has to be downgraded to Eclair via Odin, and then can you apply the root update file. I wasn't even able to root it via the universal root tutorial.

For the sake of others, I will now list the steps of rooting the Samsung Vibrant in case it is running 2.2 Froyo.

1. Download Odin, this PIT file and this tar of the Stock 2.1 Eclair.
2. Put the phone into download mode. The best way to do that is to turn off the phone and reinsert the battery. Then press both volume up and down and connect the USB cable while holding them.
3. Let all the drivers install. This won't work till all the drivers are automatically installed.
4. Open Odin. You should see a COM port connected and colored yellow.
5. Select the PIT file, and put the tar file in PDA.
6. Re-partition will be checked and that's okay.
7. Click start.
8. Ideally, it should start and complete in about 5 minutes. (If it hangs or gets stuck at setting up connection, try again with different ports. For me, it didn't work for quite some time. Then I tried to restart the phone but it showed the triangle of death [a phone and a computer with a yellow triangle in between]. But when I tried it again with that screen, Odin worked the first time.)
9. When booted into Eclair, enable USB debugging from Applications> Development.
10. Copy this update.zip to the INTERNAL MEMORY. This file will root the phone and install Superuser and BusyBox.
11. Also copy this update.zip to the INTERNAL MEMORY. This file will install Clockworkmod Recovery. Obviously both files should be applied separately because at a time only one file named update.zip can be placed.
12. To install an update, boot into the recovery. To do that, turn off your phone and then turn it on by holding the volume down and power buttons. In the stock recovery, select "reinstall packages".
13. Repeat above step with Clockworkmod Recovery update.zip

Congratulations, you now have a rooted Samsung Galaxy S Vibrant T959! Feel free to flash new ROMs!

Source

Wednesday, February 6, 2013

Dual boot your Samsung Galaxy S3


If you own a Samsung Galaxy S3 and have also used AOSP ROMs, you'd know the awesomeness of both TouchWiz and AOSP ROMs (cyanogenmod, AOKP etc). The vanilla experience of AOSP and the goodies of Samsung's TouchWiz are both very tempting and it's very difficult to choose between the two. For this reason, XDA Elite Developer gokhanmoral has made a new kernel (SiyahKernel) with a custom recovery which enables you to dual boot your i9300 and enjoy both flavors.
Before we start, here are a few things to keep in mind:
  • Always make a nandroid backup in case anything goes wrong.
  • The kernel only supports TouchWiz and AOSP Jelly Bean ROMs (Any Ice Cream Sandwich or MIUI ROM is NOT supported) [Update: The latest build from MIUIAndroid is supported. Tested and working.]
  • Keep a backup kernel and recovery to flash, just in case you're not happy with Siyah.
Let's get started. Firstly, download the latest SiyahKernel from the developer's website. Transfer the ZIP to your phone and flash it through recovery. Reboot into your primary ROM and find the app STweaks. If it hasn't appeared, download it from Play Store for free. In STweaks, go to Dual Boot options and click "Hijack Recovery". Reboot into recovery.

In Siyah recovery, follow these steps:
Dual boot options.
  • Format 2nd ROM data, wipe cache, wipe dalvik cache.
  • Install 2nd ROM from (location)
  • Flash gapps
  • Flash SiyahKernel again to 2nd ROM
  • Reboot.

Once you've rebooted, you'll find that to reboot into the secondary ROM, you have to press the Home or Volume down key while it's booting. You can also boot into the 2nd ROM from STweaks. Another useful feature of STweaks is the slide2wake option, it is really awesome.
Enjoy!
Source

Thursday, November 8, 2012

[Download] LG Nexus 4 System Dump

Here you have it folks, the system dump from the highly anticipated LG Nexus 4, exclusively from Android Task Force. The system dump is available in one large file (291MB) or broken up with the apps (144MB), sounds (3.2MB) and wallpapers (5.7MB) available by themselves. If you share this post anywhere, please source/linkback to this page. Thanks! Download links below.
  • Full System Dump  (Mirror)  (291MB)
  • System Apps         (Mirror)  (144MB)
  • Sounds                 (Mirror)  (3.2MB)
  • Wallpapers           (Mirror)  (5.7MB)
Thanks Anonymous!

HoloWeb - The Browser Of The Future. For Today


What Is HoloWeb? 
HoloWeb Is An Ultra Blazing Fast And Stylish Web Browser Built For Android 4.0+

How Fast Is HoloWeb? 
As Every Developer Would Say About Their App Its Amazingly Fast But Users Have Said That HoloWeb Smokes The Stock Android 4.1 Browser, Chrome And Firefox And Thats Amazing.

What Does HoloWeb Feature?
  • Start Page For Quick Access To Bookmarks And Recently Visited Sites
  • Phone And Tablet Support (With Full Tablet UI)
  • Only A Little Over 300KB In Size
  • An Array Of Settings And Controls
  • Addons
  • Find In Page
  • Full Screen Mode For Phones
  • The Full HoloUX
  • Full Sandboxing Of Web Pages
  • Full Security To Protect Users From The Web
  • Flash Video Support
  • Instant Video Loading (Tested On YouTube And Its Amazing)
  • Multiple Tab Support
  • Preloaded Bookmarks
  • Page Sharing
  • User Agent Choices
  • Split URL And Search Bar
  • Google, Yahoo, Bing, Ask Jeeves, Wikipedia Search Providers
  • And More
What's New In 1.4?
New Features
  • Adding The Status Bar Back
  • Brand New Custom Holo Theme
  • New White Icons
  • Updated Design
  • Smaller APK File Size
  • New Home Button For Tablets
  • Upgraded Coding
  • Updated Tablet UI
  • Updated UI Icons
  • Speed Improvements
  • Brand New App Icon
  • And More
You Can Download 1.4 Below
HoloWeb Is An Amazing Browser And I Encourage You To Try It Out.

Version : 1.4

Download : http://bit.ly/R6AJhv


SPECIAL THANKS TO ANASTHASE FOR THE SOURCE CODE AND FOR MAKING THIS ALL POSSIBLE

So Enjoy HoloWeb
Thanks,
Jack

iOS 6 Redesigned Apple Store Review

iOS-6-Redesigned-App-Store


The App Store is Apple’s crown jewel in iOS and with the release of iOS 6, it has received a major overhaul. From user interface changes to new features, the App Store has been significantly improved from its previous iteration. There have also been several under-the-hood changes and improvements to existing features. In what follows, we take a look at all the new features and improvements App Store has received in iOS 6.


Apple Apps Recommendation
When you first launch App Store on your device, you should see a recommendation popup by Apple, suggesting a few free apps by Apple and allowing you to install them together in one click.

App Store Apple App Recommendations iPhone iOS 6 App Store Apple App Recommendations iPad iOS 6

Revamped User Interface
Whether you have used the new App Store or just seen it in action, the most major change you must have noticed has to be the revamped user interface. Those of you familiar with the Chomp app discovery app will instantly recognize these changes to be inspired by it, and that indeed is the case. Apple acquired Chomp earlier this year and it seems the developers of Chomp have since been busy working with the App Store development team to deliver the new, ‘Chompy’ App Store experience in iOS 6.

App Store Featured 1 iPad iOS 6

As you can see above, the ‘Categories’ tab has been removed in favor of the ‘Genius’ tab. The whole UI has seen a major upgrade, incorporating a beautiful featured apps slide show on top, with several curated lists of popular apps below. Categories have been integrated into the Featured tab itself. Here is how it looks on the iPhone/iPod Touch.

 App Store Featured iPhone iOS 6App Store Categories iPhone iOS 6

The ‘Top Charts/Top 25’ tab has been replaced with ‘Charts’, simplifying and unifying things. This feature has also seen an interface overhaul, showing the Paid/Free/Top Grossing categories in vertical columns and eliminating horizontal scrolling altogether. The result is a much more refreshed, clean and fluid UI that doesn’t look overwhelmingly busy or cluttered.

App Store Charts iPad iOS 6

The ‘Purchased’ tab has been updated to utilize the new and refreshed interface and replace horizontal scrolling with vertical while keeping its content and functionality unchanged. To emphasize iCloud integration, the apps you have purchased or previously installed will now show up in the Purchased section with a iCloud icon next to them that you can tap to install them on your current device.

App Store Purchased iPad iOS 6


The enhanced Genius feature now utilizes the recommendation engine from Chomp to offer more relevant app suggestions, displaying results in fancy looking cards rather than a list. The Search feature has been similarly changed to display results in cards.


App Store Genius iPhone iOS 6 App Store Search iPhone iOS 6

We must say these cards look really amazing, and flicking them left and right to scroll between the Genius recommendations and Search results is a pleasure. Both Search and Genius features display a similar card interface on the iPad as well. As you can see below, Search on iPad no longer has a ‘Device’ selection box and instead offers two tabs for iPad and iPhone apps on top. In addition, the category and price selection menus have been made compact and the sorting menu has been added in the same line with them along with the result count, providing more room for displaying the results.

 App Store Search iPad iOS 6

App Info Pages
A lot has changed on the info pages for apps. Previously, you were shown a detailed description on top and had to scroll down to view screenshots, see app information like company, size, version etc., and access the ratings button, which took you to yet another page to view ratings or add your own. In iOS 6, all of this has been replaced with a refreshingly revamped interface that integrates all these features together in a much more useful way. If you have used Android, you will be surprised at how similar to Google Play Store this area feels.

App Store App Info iPad iOS 6


On the new Info page, you can see app Details, Ratings and Reviews and a newly added section for ‘Related’ apps. It’s the same information, just organized in a better way. Screenshots are now shown on top in the ‘Details’ view, similar to Google Play Store on Android, and the rest of the information is neatly organized in the sections below, showing an expandable Description, What’s New, detailed Information, Developer Info and Version History.

App Store App Info iPhone iOS 6 App Store App Details iPhone iOS 6


The ‘Reviews and Ratings’ section has also been enhanced with Play Store-like details on star ratings. The App Support page link has also been relocated to this section. The ‘Related’ feature also seems to be inspired by Android’s Play Store, and shows you apps related to the one you’re viewing. It could definitely use some improvement, as currently it only showed us more apps from Google as related apps for Google+, when it should have instead shown similar social networking apps like Facebook and Twitter.


App Store App Ratings and Reviews iPhone iOS 6 App Store App Related iPhone iOS 6


New Sharing Menu
The new universal sharing menu integrated throughout iOS has also been added to App Store, replacing the old ‘Tell a Friend’ feature. You can now share an app using Mail, Message, Facebook or Twitter, or just copy its direct web link.

App Store Share Menu iPad iOS 6


Facebook Integration
The deep Facebook integration newly introduced in iOS 6 is also visible in the new App Store. In app cards, you can now see how many of your friends have liked that app, right above its rating stars. You can like or unlike an app under ‘Ratings and Reviews’, where you are also shown the names of your Facebook friends who have liked it.

App Store Facebook Integration iPad iOS 6


You can also share the app’s iTunes Store link on Facebook from its option in the Share menu.

App Store Facebook Share iPad iOS 6

App Installation And Updates
iOS 6 also brings some changes to the app installation and update experience, aimed to eliminate a couple of annoyances that were there in the way applications were installed in iOS 5 or earlier.

App Store New App Installation Progress iPad iOS 6


Ideally, there should be options in App Store settings to choose when you want to be asked for your Apple ID password while installing or updating apps. While iOS 6 doesn’t quite bring that flexibility, it does take a step in the right direction. You no longer need to provide your Apple ID password each time you update a currently installed app or install a paid app that you have already purchased. However, you still need to provide it when installing any app for the first time, which is just ridiculous for free apps. Let’s hope a future update addresses this annoyance too by at least offering an option to disable it.

App Store New App Icon Ribbons iPad iOS 6a

Upon installing an app, you are no longer kicked back to the home screen to view the app’s icon and progress bar while it installs. Instead, you can stay in the App Store to browse and install more apps to your heart’s content. Don’t worry about keeping up with the app installation progress – it’s now visible on the app’s card right in the App Store itself. It’s a completely logical step since not many find the idea of sitting and looking at progress bars on icons on your home screen very amusing. It will also urge many to browse and install more apps by keeping them in the App Store. Progress bars still show up on the app icons so if you do find looking at them while they install amusing, by all means feel free.


App Store New App Icon Ribbons iPad iOS 6a

Lastly, your recently installed apps now have a nice, shiny ‘New’ ribbon on their home screen icons. This makes spotting these fresh arrivals on your iOS device much easier.

App Store Updates iPhone iOS 5 App Store Updates iPhone iOS 6

When it comes to app updates, you can now see the new changes made in the update by simply tapping “What’s New” under the app’s name in the list of updates. In addition, ‘Update’ buttons have been added on all the apps in the list, letting you directly update them individually without having to open their details screen. The comparison below shows these changes, with iOS 5 on the left and iOS 6 on the right.


Changes In Settings
Apple has combined settings for all its stores into one in iOS 6. The section for App Store in iOS 6 Settings has been renamed to ‘iTunes & App Stores’ from ‘Store’, thus combining settings of both these stores together. Therefore, the ‘iTunes Match’ toggle is now available under this section.

App Store Settings iPad iOS 6

Under The Hood
In addition to the visible changes, there have also been several improvements under the hood. First and foremost, the app ranking algorithm has been tweaked, reflecting the work done by the Chomp team since its acquisition by Apple. The visible aspect of this change can be seen in the way the ‘Genius’ feature has been made more prominent, while giving the ‘Categories’ section a back seat.


This will call for a need at the developers’ ends for better app store optimization, as app rankings now incorporate Chomp’s algorithms that rank them based on several factors including popularity on blogs and social media websites, user response to recommendations and an analysis of search terms used by users in App Store, browser as well as certain other search apps.

This concludes our coverage of the new iOS 6 App Store. Stay tuned as we continue bringing you details on the latest and greatest from iOS 6.

A great Review courtesy of Addictivetips.

Nexus 4 Build Quality Shot Quantified


Several pictures of the LG-built Google Nexus 4 have been showing up across the Internet. The featured image in this article really caught my eye because it shows the internals of the device relatively well. While this device has not yet been released, a lot can be said (and judged) about a device’s hardware, even without full board shots. Overall, it appears to show that LG’s build quality is considerably lower than that of the Samsung Nexus devices in the past. In this article, We intend to write about the design pros and cons of the highly anticipated Nexus 4.

Design Pluses
Large external speaker - One of the biggest complaints with Samsung’s designs is the low powered/small sized speaker. While it delivers a trade-off in battery life versus sound quality/quantity,  the Nexus 4′s larger speaker should suffice to produce adequate sound.

Good speaker placement - The speaker placement on the Nexus 4 places the speaker at the corner of the device rather than the center, where your palm blocks it in portrait mode. While the Galaxy Nexus forces you to hold the device in an odd position to bounce sound from your palm to your ear while in portrait mode, the Nexus 4 will not have this problem. The corner orientation places the speaker in a optimal position for both landscape and horizontal palm redirection while watching movies. This same orientation can also be seen on the Meizu MX.


Design Minuses
Bolted in battery - The defining line between “Operator Replaceable” and “Qualified Service Technician” is the use of tools. The Nexus 4 not only requires a screw driver, but the plastic tabs on the edges will break if removed improperly. Once those tabs are broken, signal quality will be lost from the connection with the Spring Antenna Connections.

Spring Antenna Connections - The problem with Spring Antenna Connections or simply Spring Connections in general is: When tension is lost, signal is lost. Loss of tension between the back plate and the board can occur when a tab breaks or the back plate is warped. Warping of back plates can occur easily, and is quite frequent as devices age from stress, dropping, impact, or even a day in a hot car. You may notice some old devices such as remote controls or phones will squeak and creek when you press on them. This noise is generally attributed to warping or breakage of tabs, which would be critical for the WiFi/NFC/data/GPS/Bluetooth connections on the Nexus 4.

Lack of impact zones - Many current devices including Samsung’s entire lineup include impact areas around the bolts and the edge of the device.  This allows the device to sustain impact without altering the physical structure of the board, causing components to come lose.  The absence of impact areas causes a device to be more fragile and less resistant to impacts.  This also increases a device’s warpage risk, which can alter device dimensions and cause the Spring Connections to fail.

Tape used instead of structure and shielding - A well designed device will use its own structure to hold components in place. Tape is a disposable part. Disposable parts have no place inside of a properly designed device. The disadvantage here is tape can take components off the board when removed. Tape is also messy, and leaves residue on a board and other components. There is never a situation when using tape instead of physical structure is required, and the use of tape is often a harbinger for other build quality problems.

Recommendations for next revision
Make the speaker grill bigger - A speaker grill is designed to keep the operator’s fingers out, not to keep water out.  The small size of the speaker grill on the Nexus 4 will impede speaker sound and motion, and thus the overall dB level. This physical obsturction means the speaker wastes power on compression of air rather than audible sound creation.

Replace the battery tape - Instead of using tape for the battery, a slight overhang at the bottom of the metalized battery section will suffice to keep the battery from moving around inside the device.  Another way is to place glue or double-sided tape on the bottom of the battery.

Replace the communications tape - Instead of metalized tape on the communications section of the board, use a physical shield cap, which makes it serviceable and more tidy.

Use impact zones - Impact zones prolong device life.

Use a physical connector and a film substrate for the back cover - The back cover of the device consists of several separate connections spread across the entire device.  This means warpage anywhere in that area can cause the device to lose connectivity.   The primary focus of a mobile device is connectivity, and that should not be trusted to spring connections. The spring connections should be replaced with a physical connector of some sort. A physical connector would also save space.

Do not bolt down batteries - Batteries should be easily removable in the event of a problem.  Getting the rear cover off is enough work.  The compression method has been trusted across the spring connectors on the board, which are held in place solely by pressure. A proper connector holds itself in place. A slight bit of foam-rubber would do the same job as a spring, save space, save tools and remove the need for “tools” when replacing the battery.

Do not put the IMEI on the back cover – There will surely be aftermarket accessories for the device or people who want to replace the back cover, or add an extended battery.  The IMEI should be on the board, or at least bolted to the device.

At first glance, the Nexus 4′s hardware appears to be a quality downgrade from the Galaxy nexus. After release we hope to be able to give a much better analysis.

[Photo Credit: Reddit]

Source:XDA

Tuesday, November 6, 2012

Choose your side!

android vs ios vs wp8


When it comes to talk about mobile operating system, there will only three popular OS in our minds: The Apple’s iOS, Google’s Android and Microsoft’s Windows Phone. Recently, the war in world of mobile OS becomes hotter with each others’ plans to release upcoming newer version with obviously better features. Lets say Apple with iOS 6, Microsoft with Windows Phone 8 and Google with Android 4.2 Jelly Bean.
 
  • Well, let’s start with what’s coming on the Windows Phone front. The most major under the hood change that we’ll see in Windows Phone 8 is the switch to the Windows NT kernel. This means that the OS will heavily share code with its desktop counterpart (networking and multimedia code is pretty much the same across platforms), and it will take advantage of many under the hood performance enhancements made in Windows 8 for mobile devices. Apps can be easily ported across platforms, and desktop-grade features such as UEFI secure boot, BitLocker, and a more phone-optimized version of Internet Explorer 10 are all made possible because of this. Put simply, Windows Phone will become more of a brother to Windows 8 than a cousin.
  • Also coming to the Windows Phone platform is a revamped, more useful version of Tellme, smaller home screen tiles, the phasing out of the Zune services with Xbox-branded media services taking its place, OTA updates, and NFC support, among other things.
  • As you can see, some pretty major improvements are coming to Windows Phone. So major, in fact, that the update will not be able to run on existing devices.


  • That being said, what’s new in Jelly Bean? Some pretty major things are in the pipeline with Android’s upcoming OS as well. There are a few improvements that we were unable to really mention on the chart. For one, Google touts that some pretty significant performance improvements were made in the OS, particularly to create “fast, fluid and smooth” transitions between apps or the home screen. Notifications have also been revamped. Described as “actionable“, they now allow you to view and react to a notification by taking the appropriate action (such as being able to reply to an email).
  • What we did not mention, however, is an updated version of Android Beam, an NFC-based feature that makes it easy to share between Android devices in close proximity to each other. Also, Google has concocted its own voice assistant to rival Siri dubbed Google Now.


  • iOS 6 is the upcoming major update for the iPhone, iPad and iPod touch. It brings with a bunch of new and handy features. To name a few, we have Facebook integration, 3D maps, a smarter Siri, better Mail app, shared Photo Streams, Passbook etc.


So, before I jot down the details of the three OSes and spoil the fun altogether, take a look at our comprehensive chart below courtesy of guys at Redmondpie:


iOS 6 vs Jelly Bean vs WP8


Saturday, November 3, 2012

After Google, Microsoft and Apple, we have Facebook

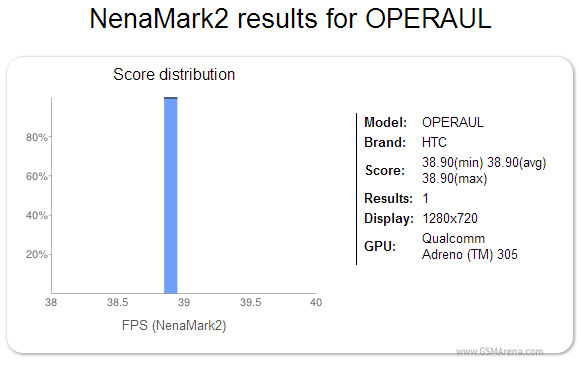
Facebook might be working on a Facebook phone after all, despite repeatedly denying any such plans. A reliable source told Pocket-lint that HTC is working on a device codenamed Opera UL.

The phone in question has appeared in the NenaMark2 results database and what we learn is the phone is powered by a 1.4GHz (probably dual-core) Krait processor with Adreno 305 graphics and sports an HD display. It's currently running on Android 4.1.1 Jelly Bean.
It seems Pocket-lint have no reason to doubt their source and we should probably be listening for a word from HTC and Facebook in the indefinite but not so distant future.

Source

Dawn of True HD 1080p Smartphones


The first 1080p smartphones are a reality and regardless whether you consider 400+ ppi pixel density as great or as an overkill, the next generation of Android flagships will most probably feature FullHD screens.


MK News is reporting that Samsung is already working on a Full HD display, which will use the company's trademark Super AMOLED technology while LG is using  Advanced High Performance In-Plane Switching or AH-IPS LCD.


This is the same technology that LG used in one of its panels last year for which they also won an award. Compared to standard IPS panels, AH-IPS panels have greater color accuracy, wider viewing angles and greater light transmission which leads to lower power consumption.
It's not clear how big the display will be either, though it should have a pixel density of at least 400 ppi  meaning 5" or bigger
 
Speaking of phones with 5-inch Full HD screens, the HTC J Butterfly is already official.

It packs  5.0-inch, Super LCD 3 with a resolution of 1920 x 1080, which gives it a pixel density of the astonishing 440 ppi. The display is quite big but at 143 x 71 x 9.1 mm, the J butterfly is only slightly bigger than the One X (134.4 x 69.9 x 8.9 mm) and at 140g weighs just 10g more.

Inside, the HTC J butterfly runs on a quad-core Qualcomm APQ8064 Snapdragon S4 processor clocked at 1.5GHz with 2GB of RAM. It has 16GB internal memory along with a microSD card slot.


On the back is an 8 megapixel camera with 1080p video recording and on the front is a 2 megapixel camera. The phone supports LTE and NFC and is dust and waterproof (IPX5). Strangely, for a phone with such specs, the battery is only 2,020mAh. Lastly, the J butterfly will ship with Android 4.1 Jelly Bean out of the box.


The Oppo Find 5 has a 5-inch screen of Full HD resolution with a narrow 3mm bezel. It runs on 1.5Ghz Qualcomm APQ8064 quad-core chipset with 2GB RAM. The aluminum unibody has a thickness of merely 6.9mm and the 12MP camera with a Sony backlit sensor allegedly doesn't bulge at all.
But that's not all, as there is also a nice and hefty 2500mAh battery inside to power the thing. Oh, and there's Android 4.1 Jelly Bean preinstalled.


Close window

The Xperia C650X Odin is rumored to feature a 5" screen with the impressive 1080p resolution, resulting in an mind-blowing density of 440 ppi, a quad-core Snapdragon S4 Pro processor with four 1.5 GHz Krait cores, a 13 MP snapper on the back, 2GB of RAM and 32 gigs of internal storage.

All these beasts are set to launch sometime next year , but one thing thing is for sure that they'll give the smartphones of today a run for their money.

Stay tuned guys!


Source 1 ,Source 2, Source 3.

Wednesday, October 31, 2012

The universal root tutorial

If you've read our Root page, you should be convinced that all Android devices should be rooted. Once you've decided that, it's time root. There are multiple methods, most of them involving a root toolkit. Today, I'll teach you how to manually root an Android device, developer style.

The reason for this tutorial is that there are often rare Android devices which do not get much (if any) attention from the developers. These include Korean devices and other small companies. This method is universal and really handy. REMEMBER: Though really simple and harmless, I don't take any responsibility for your device not working, not dancing (or dancing for that matter) or if turns into an AK-47 and kills you.

What you need:

SDK is a developers' tool provided by Google. You just need to install it in your C drive. It looks really complicated but don't worry, you won't have to use it directly; rather from the command prompt.

When you have downloaded and extracted the ZIP given above, you should have the su-v3, busybox, Superuser.apk, psneuter, and GingerBreak files. Rename su-v3 to su and place all the files in C:\SDK\platform-tools.

Next, you need to have the proper drivers. Enable the USB debugging mode from Settings>Developer options and connect your device to your PC. Most probably it will detect the ADB interface and automatically install it from the internet. But if it doesn't work, Google ADB drivers for your particular device and install them like a program. Remember, the process will not work unless your Windows detects and installs the ADB interface.

The rooting process:
Now is the fun part. It might appear difficult but it's really simple if you follow the instructions and commands carefully. I did it right the first time.
Open command prompt. (Ctrl+R "cmd" or Start>All programs>Accessories)
Navigate to the SDK folder. If you don't know how to navigate in command prompt, Google it. Briefly, type cd\ to go one step up and cd foldername to navigate into a folder. (cd means for change directory but you just have to type cd)
You should be in C:\SDK\platform-tools>

Step 1: Entering the shell
This command will leave you with a shell prompt in the platform-tools directory. From here, you can run the commands that will actually root your phone. Be sure to run these commands exactly as they are written. The commands with an "$" or "#" will only run after the "adb shell" command.
First, here are the commands that run the psneuter exploit and gain a root shell.
  • adb devices
  • adb push psneuter /data/local/tmp
  • adb shell
  • $ cd /data/local/tmp
  • $ chmod 777 psneuter
  • $ ./psneuter
Step 2: Restart ADB server
At this point, the exploit will run and close the shell. You will need to run these commands to restart the ADB server.
  • adb kill-server
  • adb devices
Step 3: Confirm root
Now comes the moment of truth. Use the
  • adb shell
command to open a shell. If you see a "#" sign, you have root access, so go ahead and continue to the next part of this tutorial. If not, you can go back and try the previous steps again, or ask for help in the comments.

Step 4: Make root permanent
We now need to make this root permanent. From the root shell you just opened, type the following commands.
  • # mount -o remount,rw -t rfs /dev/block/st19 /system
  • # exit
  • adb push busybox /system/bin
  • adb push su /system/bin
  • adb install Superuser.apk
  • adb shell
  • # chmod 4755 /system/bin/busybox
  • # chmod 4755 /system/bin/su
  • # mount -o remount,ro -t rfs /dev/block/st19 /system
  • # exit
  • adb reboot
Step 5: Confirm root from device
At this point, your device should reboot. You can check for the Superuser icon in the app drawer, and then try a root only app like Titanium Backup. If that works, congratulations. You have successfully rooted your Android device. Prepare to enjoy all the benefits of root.

If you face any kind of trouble, leave a comment and we will try our best to respond quickly.

Source

Android 4.2 Camera


Hot on the heels of the Android 4.2 keyboard (the one with Gesture Typing) getting leaked, we now have the new camera and gallery apps from Android 4.2 available for manually installing as well. The camera now sports a new interface, allowing you to access settings by swiping anywhere on the screen, and other improvements, while the gallery app also features a new interface, similar to other Google apps like Google+.

However, the most talked about feature of the Android 4.2 camera – Photo Sphere – is not yet working, though the person responsible for leaking the app is said to be working at fixing it. Everything works nicely though, and people running an Android 4.1 ROM like CM10, AOKP, or any other similar AOSP ROM can try the camera and gallery right now.

Follow the instructions below to install the Android 4.2 camera and gallery.

How to Install Android 4.2 Camera and Gallery


1.    First, make sure your device is rooted, as this requires changing a few system files not accessible without root.
2.   [Important] Ensure you are using an AOSP Android 4.1 ROM, such as CM10, AOKP, or any other similar ROM. Do NOT try this on a stock manufacturer ROM. This will only work with Android 4.1.

3.   Download the Camera/Gallery APK from one of the links below:
Download Link  |  Alternate Link  |  Filename: GalleryGoogle.apk

4.   Copy the GalleryGoogle.apk file to your device.

5.   Now, we need to use a file manager app that allows accessing system files. If you already use one and know how to make changes to system files, open that file manager and go ahead to step 6.

Those who don’t have a root file manager installed, follow steps 5.1 to 5.5 below:

       5.1   Install ES File Explorer from the Play Store.


       5.2   Go into its Settings, then scroll down and click on the Root settings option.

       5.3   Enable the “Root Explorer” option, then click Yes when prompted. Then, click the Allow/Grant button on the next popup to grant root access to ES File Explorer.

       5.4  Also enable the options “Up to Root” and “Mount File System”. Then, close the settings and go back to the main app.

       5.5 Then, press the “Up” button on the top till you can see folders such as “acct”, “cache” etc.


6.   Go into the system/app folder. Here, if a file named GalleryGoogle.apk already exists, rename this file to anything else (make sure to mount the system as R/W if you are using a file manager other than ES File Explorer).

7.   Now, browse to where you copied the GalleryGoogle.apk file in step 4. Long press on this file and select Copy. Then, browse to the system/app folder and paste this file there.

8.   Then, long press on the GalleryGoogle.apk file and click the Properties button. 

Then, click on the Change button.


9.   In the Change window, make sure that the read and write are options are enabled for User, and only the read option is enabled for Group and Other. It should be like the screenshot below.


Now, reboot your device.

Once your device reboots, you will be able to use the Camera and Gallery from Android 4.2.

NOTE: To revert to the original Gallery and Camera, simply delete the GalleryGoogle.apk file from system/app. Also, rename the original file back to GalleryGoogle.apk if you renamed it in step 6. Then, reboot your device.
The Android 4.2 camera and gallery app are now installed on your Android device. Enjoy, and do let us know how they work for you!

Via: XDA

Android 4.2 Keyboard


Guess what we've got for you today. Some Android 4.2 goodness for you to try out in the form of the new Gesture based with the hovering suggestions that the Nexus 4 and Nexus 10 have. The folks over at Droid Life have managed to put up an apk file as well as a flashable zip file of the new Android 4.2 keyboard that has apparently been pulled from a Nexus 4 system dump.

The apk seems to be from an early build, and the floating predictions may not look as they sharp as they actually appeared in some of the Nexus 4 demo videos, but I can say from personal experience after having installed it that it works smoothly, accurately, and is by far the best Android keyboard ever made available to date – period. It automatically predicts the next logical word in a sentence, picks references to names from your contact list so you don’t have to spell them out by typing the letters individually, and the floating predictions look uber-cool. Perfect show off material!

Here’s how you can install it on your device. You need to be on Android 4.0 or higher though. Assuming you are, there are two methods of  installing the new 4.2 keyboard, depending on what kind of a ROM you are running on your device.

How to install the Android 4.2 Keyboard – Method 1

If you’re on a phone with a custom UI like Touchwiz, or HTC Sense or Sony’s Xperia UI that has the stock keyboard disabled, you can just download the file from the link below and install it like any other apk file. You do not need to be rooted, but you do need to make sure you have “Install from unknown sources” enabled in your phone settings.

Download Android 4.2 Keyboard APK

Once you have installed the apk file, just enable “Android keyboard.” from the Language and Input section in Settings, and switch to the new keyboard.

How to install the Android 4.2 Keyboard – Method 2

If Method 1 doesn’t work, you’re probably using a ROM that is based on stock Android (AOSP, AOKP), or you are using stock Android on a Nexus device.  In this case, you’ll need to download the ZIP file below, and flash it through CWM recovery. Which also means that you need to be rooted, as the zip file will flash the new keyboard to your  /system/apps folder. Before you flash the new keyboard, it is recommended that you back up just the stock keyboard OR to be on the safer side, perform a full backup of the system image in CWM recovery.

Download Android 4.2 Keyboard – Flashable zip file

Once you have finished flashing the zip file in recovery, just reboot your device, and activate the new Android 4.2 keyboard from the Language and Input option in your phone settings.

Go ahead and check it out. It’s really cool to use, and installation is a cinch. And don’t forget to let us know how you liked it.

Via Droid Life